Bg-Pattern.svg
News
Tips and Tricks for Installing ALIGN and ALIGN MAX Grips Ribbed or reminder grips were born decades ago. In fact, the earliest versions started as a coat hanger slid underneath the grip – a makeshift solution to support more consistent hand placement. In 2017, Golf Pride revolutionized reminders with ALIGN Technology – a raised ridge that made the reminder visible for the very first time.

Now, in 2025, we’ve elevated the technology once more in ALIGN MAX. With a ridge raised to the maximum allowed height.

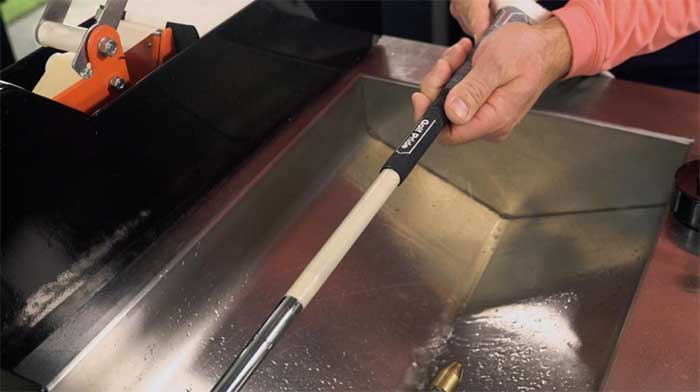
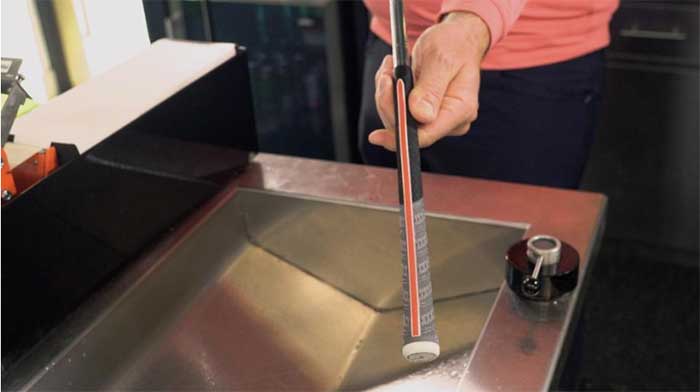
With any ALIGN Technology, the key to that consistency starts from the moment you regrip. Ensuring that the raised ridge is perfectly straight is crucial. If it is misaligned or twisted during install, your hands will be set up in the wrong position.

Rest assured, we’ve got a few easy tips to help make regripping with ALIGN and ALIGN MAX less intimidating. For a more thorough step-by-step guide, check out our ALIGN MAX installation how-to.


Use the installation marks as your guide

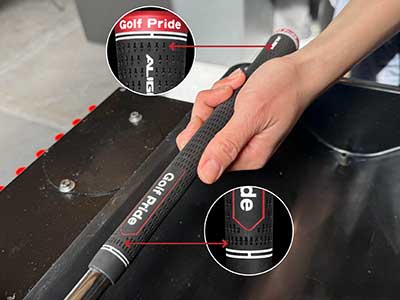
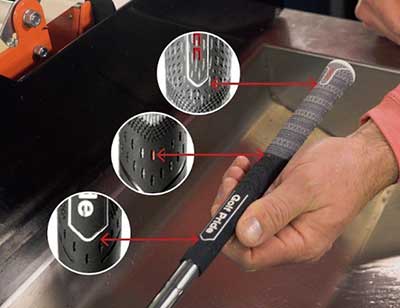
On the front of every ALIGN and ALIGN MAX grip, you’ll find two to three visual guides. 

On the ALIGN MAX MCC models, you’ll find three visual guides – one tick mark in the center, the point of the top “fang” and the point of the logo.

On the ALIGN MCC you’ll find three tick marks. One underneath the end cap of the grip, one in the center and one underneath the logo at the mouth of the grip.

And on the ALIGN Tour Velvet and ALIGN ZGrip Cord models, you’ll find two tick marks. 

These guides help you keep the grip square to the club’s leading edge. 

ALIGN

ALIGN grip being installed on a club

ALIGN MAX

ALIGN MAX grip being installed on a club

Apply even pressure to the end cap only to prevent distortion

When sliding the grip onto the shaft, apply pressure only to the end cap and slide it forward until the grip is fully seated. Excessive pulling or pushing on the ridge itself will likely result in warping or distorting the ridge. This action will help ensure the ALIGN feature remains straight. One benefit of ALIGN MAX is a firmer ridge that’s easier to install, requiring less pressure.


Sliding  ALIGN MAX grip over the taped shaft

Use extra grip solvent to allow time for adjustments

ALIGN grips are best installed in one fluid motion – or push – onto the shaft to prevent any pulling or twisting of the raised ridge. Using extra grip solvent helps ensure you don’t need to install the grip in multiple motions and possibly twist the ALIGN feature.

With any grip it’s important to ensure it’s aligned properly on the club. To get the most benefit from the features of the ALIGN ridge, you’ll want to make sure it’s not misaligned. Extra solvent increases drying time giving you more time to check alignment and adjust.

Checking quallty of work after an ALIGN MAX install

After sliding the grip onto the shaft, remove the club from the clamp, place the clubhead on the ground or out in front of you and make any adjustments before the solvent dries. You can also line up the clubface against a square surface nearby to ensure the ALIGN ridge is straightly aligned to a square clubface. This ensures the ridge is straight from top to bottom. Be patient & allow for extra drying time.

The more grip solvent you use, the more time we recommend waiting to let your clubs dry before taking them out on the course. If you try to swing your clubs too soon after installation, the ALIGN ridge could twist, so give your new grips at least 3-4 hours (preferably even longer if using extra solvent) to fully dry.


Find the right ALIGN grip for you and regrip today

At Golf Pride we continue to innovate new ways to help you grip the club more consistently, shot after shot, with our ALIGN raised ridge technology.

To shop our entire line of ALIGN products and learn more about what the best ALIGN grip might be for your game, check out our family of ALIGN grips.